How To Host Start9 Services On The Clearnet

I wrote a guide that teaches you how to run Ghost self hosted on a Start9 server onto the Clearnet using the cloudflared-startos app on github.. You may also adapt these to host any other app on your Start9 server to the clearnet(i.e. LNBits, VaultWarden, or Jellyfin) Before you begin, read the warning message:
----- WARNING -----

This is for advanced users who know what they are doing.

Exposing your server on the internet brings a lot of responsibility and can expose your server/service to all kind of attacks.

Don't be reckless!

----- WARNING -----
Be careful. Make sure you don't expose something private or secret. For example, it is possible to expose your LND instance to the whole world, but doing so would also expose your private keys. That's obviously a bad idea so be careful.
If you find this useful,thank Remco Ros with a [zap](Remco Ros)
How To Host Start9 Services On Clearnet
Step 1
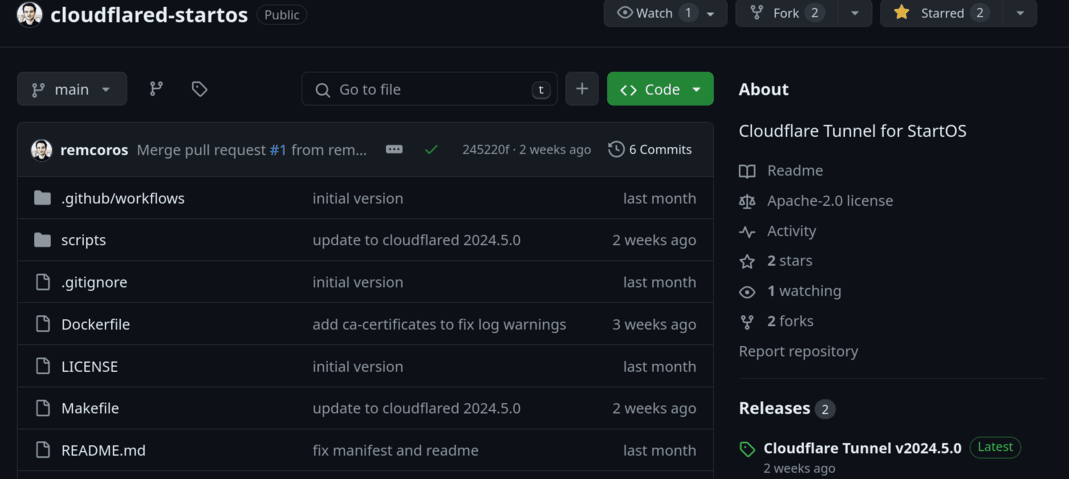
Download the latest release of Cloudflare Tunnel under the releases tab as shown on the bottom right hand corner of this picture.
Step 2
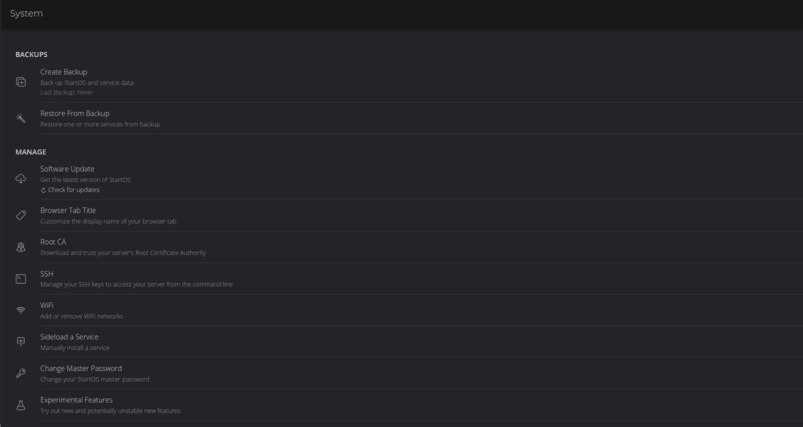
Under the System Tab of the Start9 operating system, click on "Sideload a Service."
Step 3
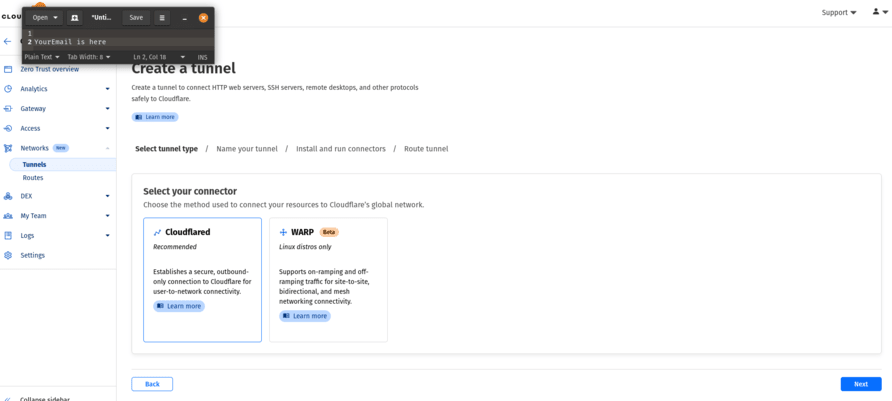
In Cloudflare: Navigagte to Networks > Tunnels. Then click create a tunnel. Click next.
Step 4
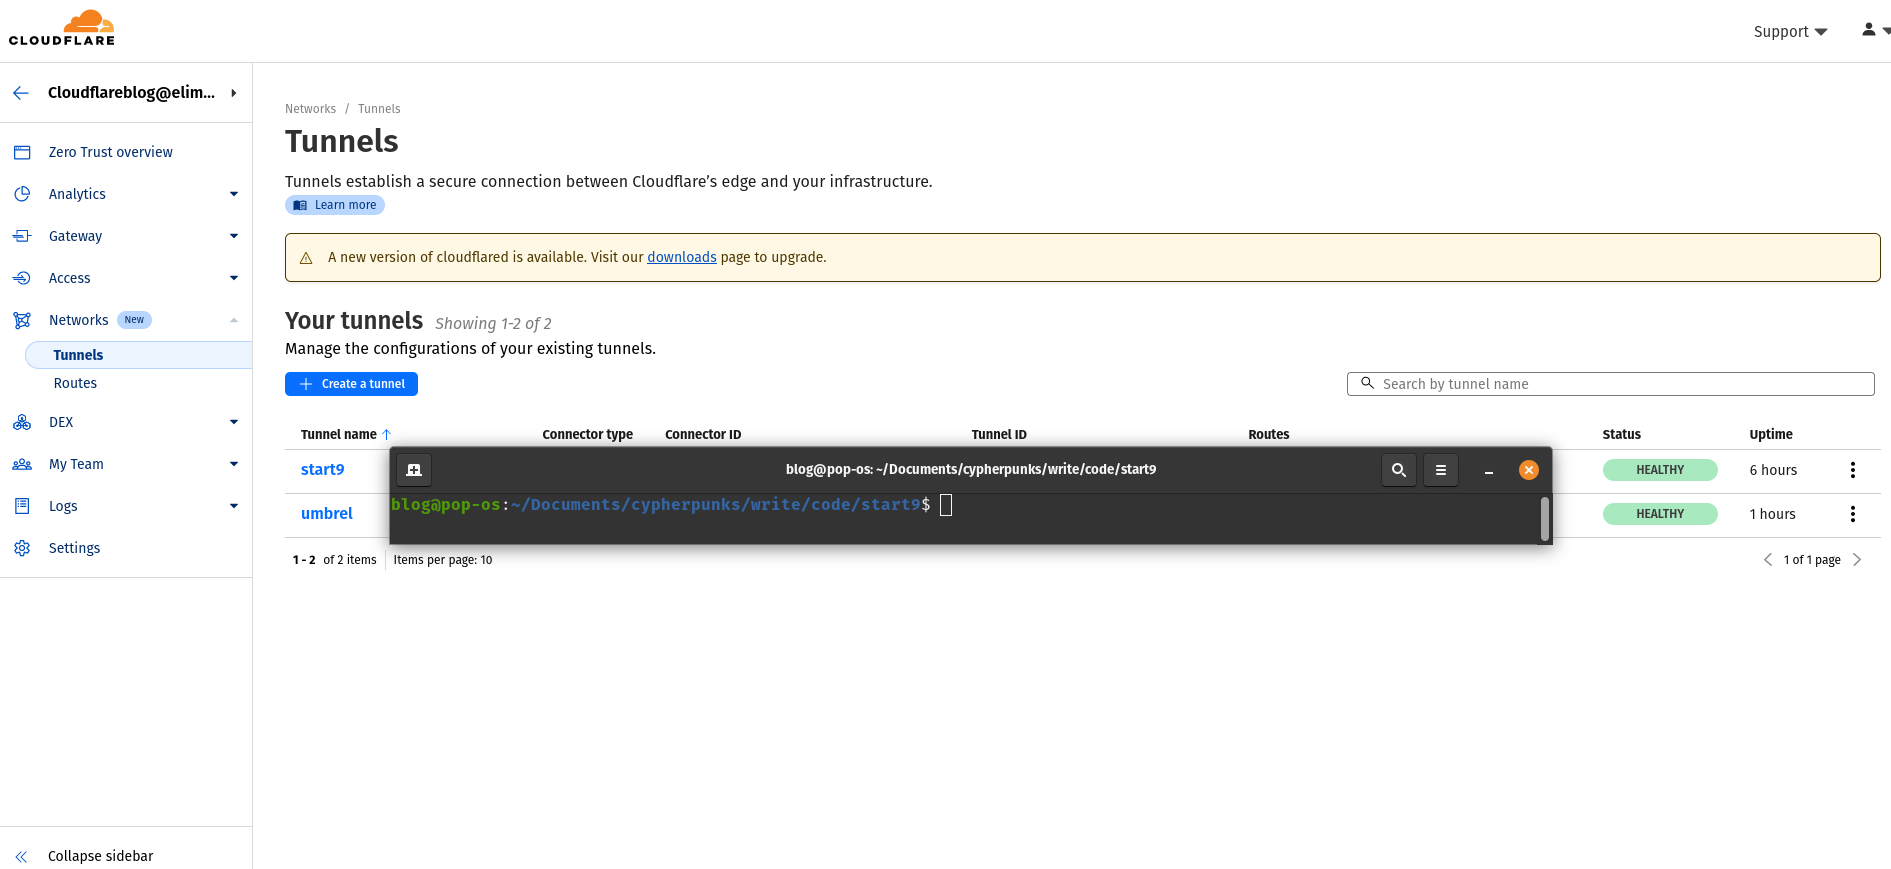
Click on your tunnel name.(eg. start9)
Step 5
Click "Edit"
Step 6
copy the string of letters and numbers after word "install". In this example, we would copy"eyJpc3MiOiJnaXRodWIuY29tIiwiYXVkIjoicmF3LmdpdGh1YnVzZXJjb250ZW50LmNvbSIsImtleSI6ImtleTUiLCJleHAiOjE3MTY5NDc4NTEsIm5iZiI6MTcxNjk0NzU1MSwicGF0aCI6Ii81Njc1NjgxLzI4NTg0NDg4Mi04YmJhMjAzYi0wNGVhLTRhNDItYjZhZC1kNGVhZmQxODdhYTQucG5nP1gtQW16LUFsZ29yaXRobT1BV1M0LUhNQUMtU0hBMjU2JlgtQW16LUNyZWRlbnRpYWw9QUtJQVZDT0RZTFNBNTNQUUs0WkElMkYyMDI0MDUyOSUyRnVzLWVhc3QtMSUyRnMzJTJGYXdzNF9yZXF1ZXN0JlgtQW16LURhdGU9MjAyNDA1MjlUMDE1MjMxWiZYLUFtei1FeHBpcmVzPTMwMCZYLUFtei1TaWduYXR1cmU9YjljMDY4NzBjZWZhOTIwMTMzNDlhZTY4NTk1ZGIzNTIzMzZlMjA0YjI0MzhmM2NjYTZlOTFmNjYwMGUwNDNkYyZYLUFtei1TaWduZWRIZWFkZXJzPWhvc3QmYWN0b3JfaWQ9MCZrZXlfaWQ9MCZyZXBvX2lkPTAifQ.fMihDAKKp2FLS-qit4DN7s5818FWt3dc0u" but your characters will be different.
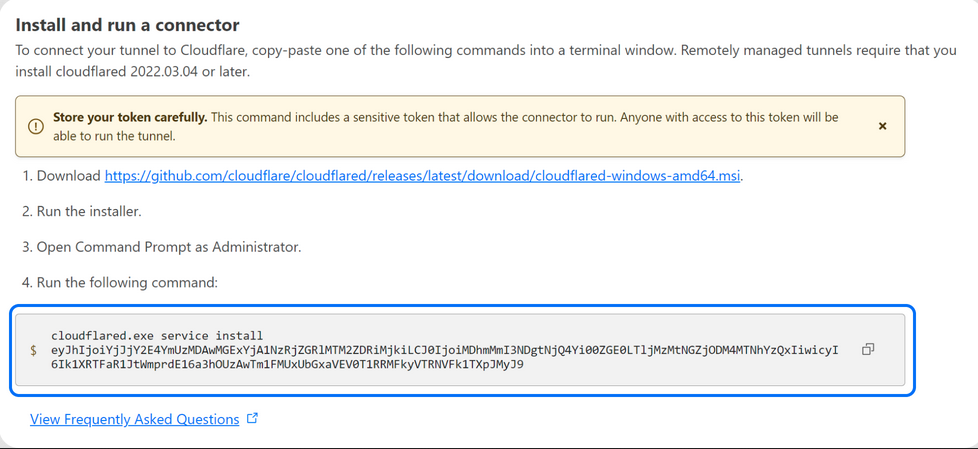
⚠ Handle this command carefully. It includes a sensitive token that allows the connector to run. Anyone with access to this token will be able to run the tunnel.
Step 7
Paste this token into the token field of the Config "Customize Cloudflare Tunnel" tab. Then click SAVE and Start the service
Step 8
Navigate back to the tunnels page on Cloudflare. Click the public hostname button.
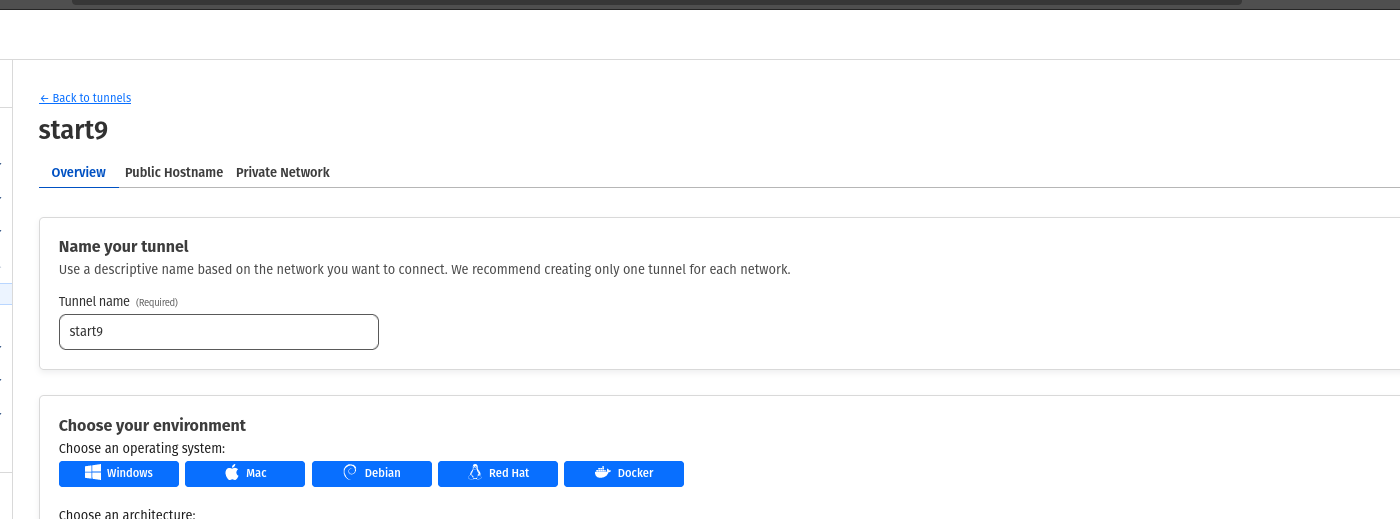
Step 9
Click "add a public host name."

Step 10
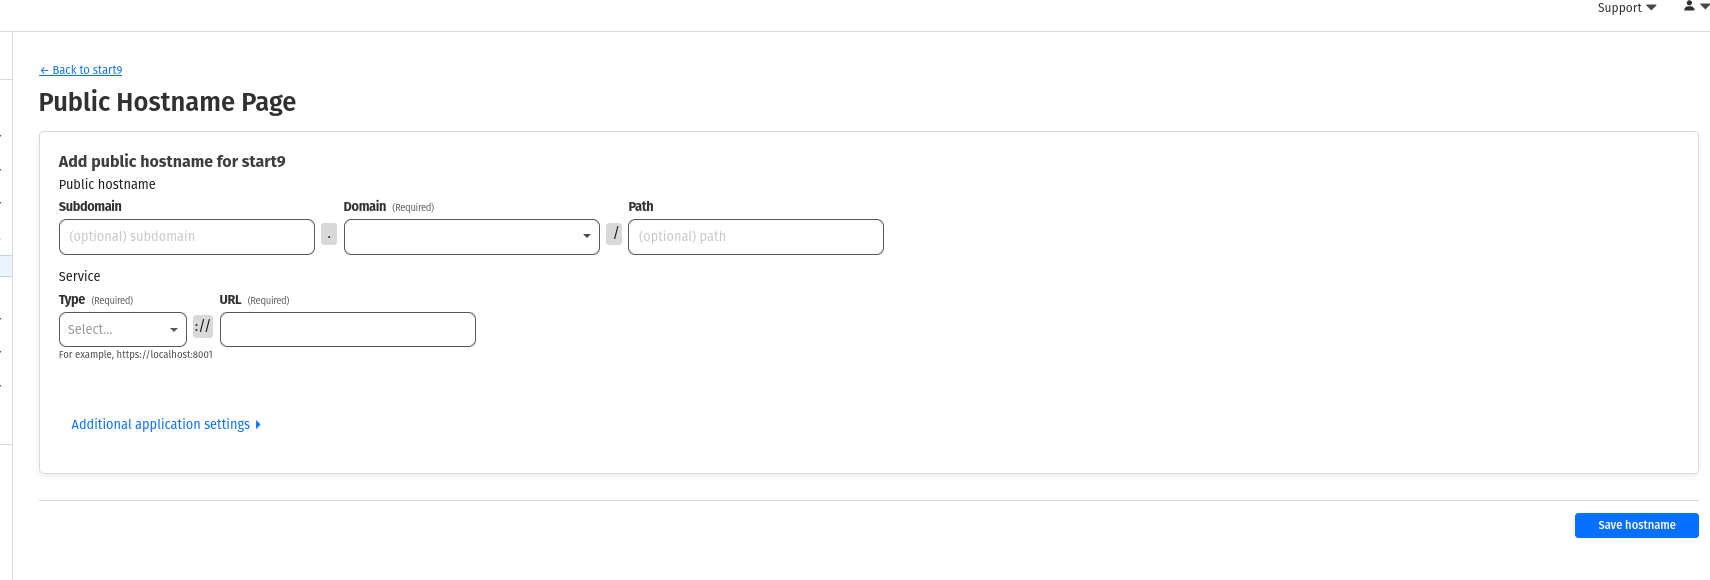
On the Public Hostname Page add a domain. You can also add a subdomain in the subdomain section(eg. ghost for the ghost app)
Under type, enter HTTP
**The URL will depend on the service you are adding.
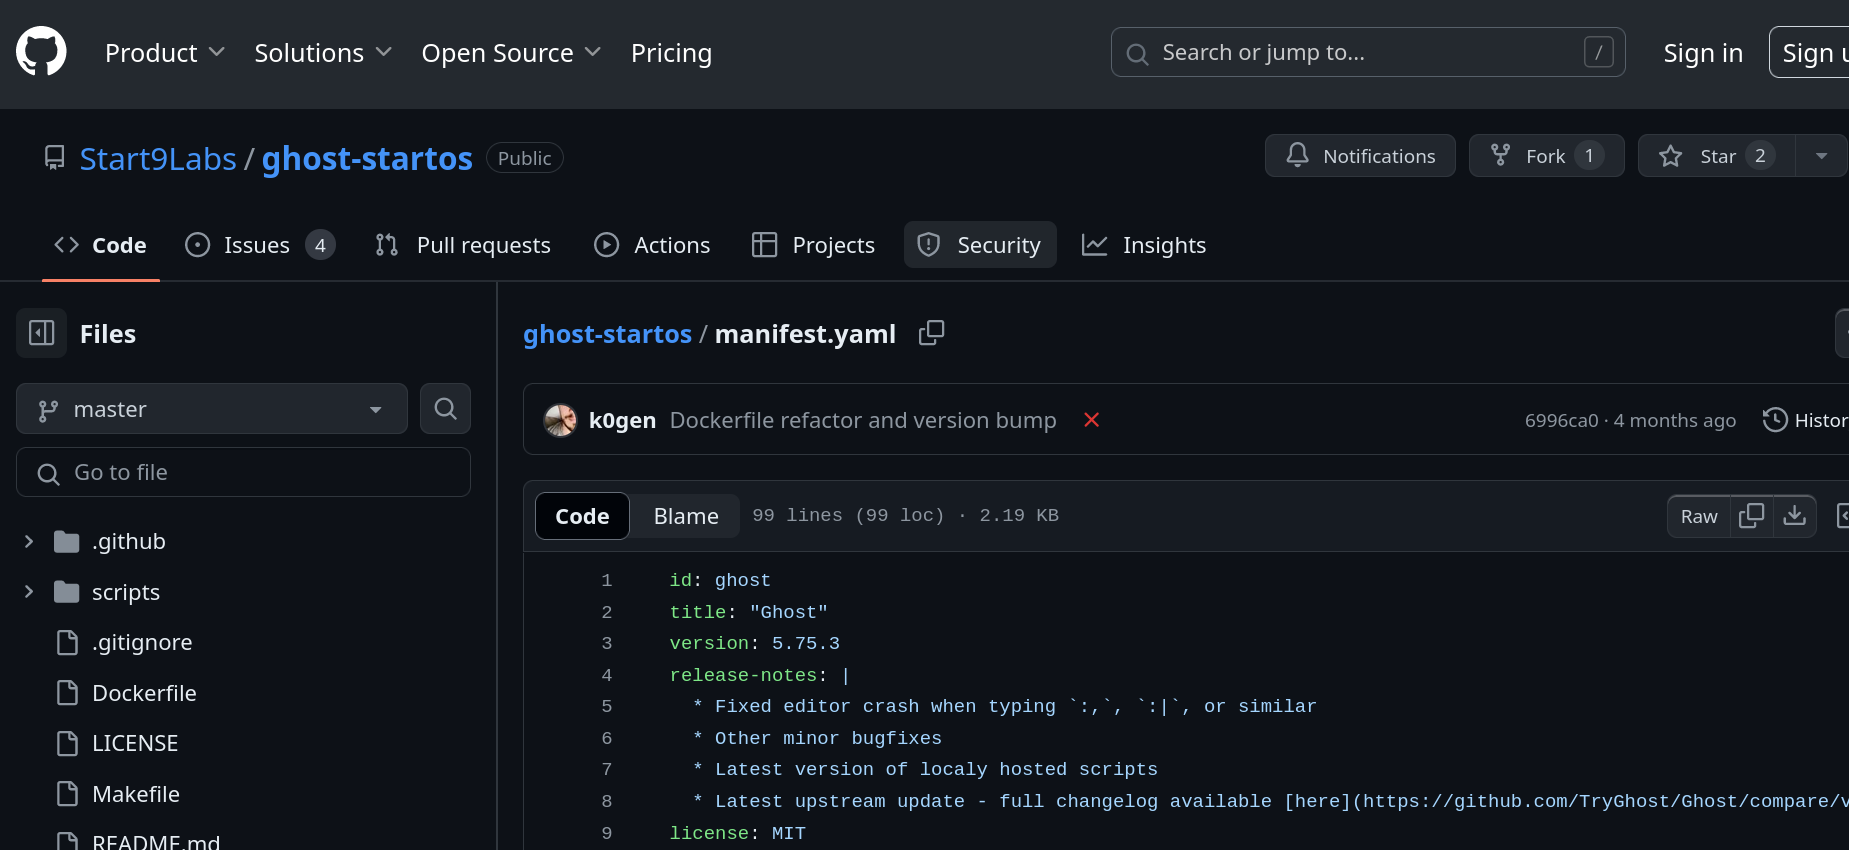
Say you want to add Ghost. Search for Ghost repository under
It can be found here:
Next, click on the manifest.yaml file use the id for the program, in this example it is "ghost". It would be "btcpayserver" if we were exposing the btcpayserver app, but the ID is ghost in this example so we will intere "ghost.embassy:2368 in the URL field of the Public Hostname Page back on Cloudflare.
The number "2368" is the port number and I found it under the port-mapping. In this case on line 53
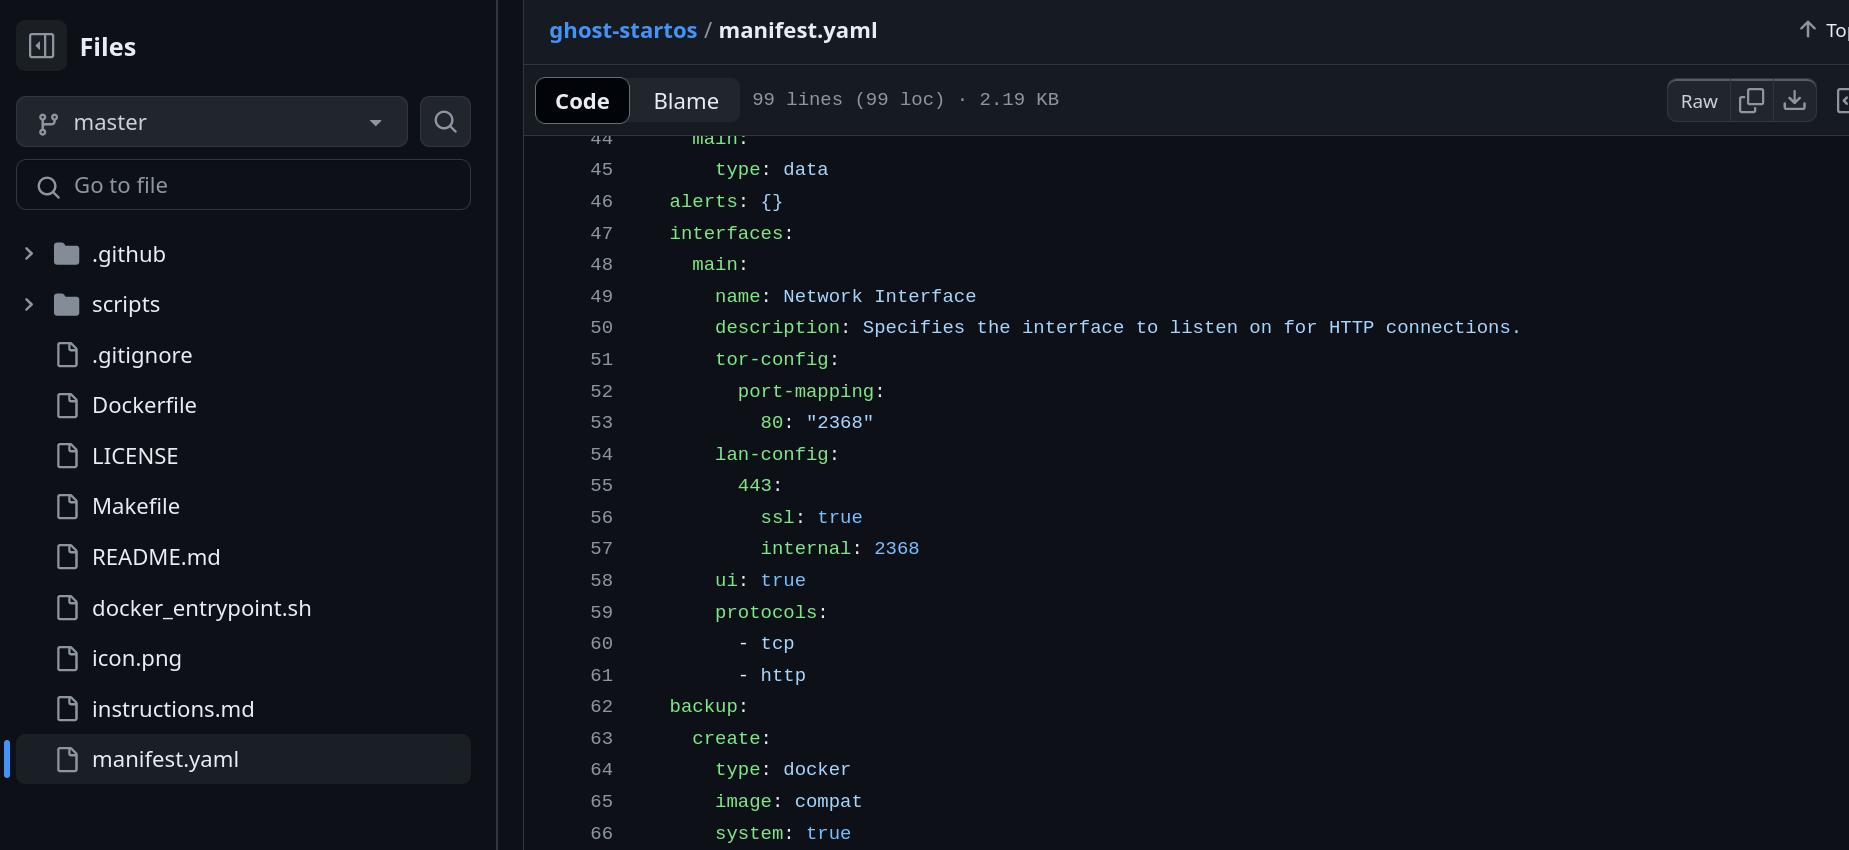
So our Public Hostname Page should look something like this:
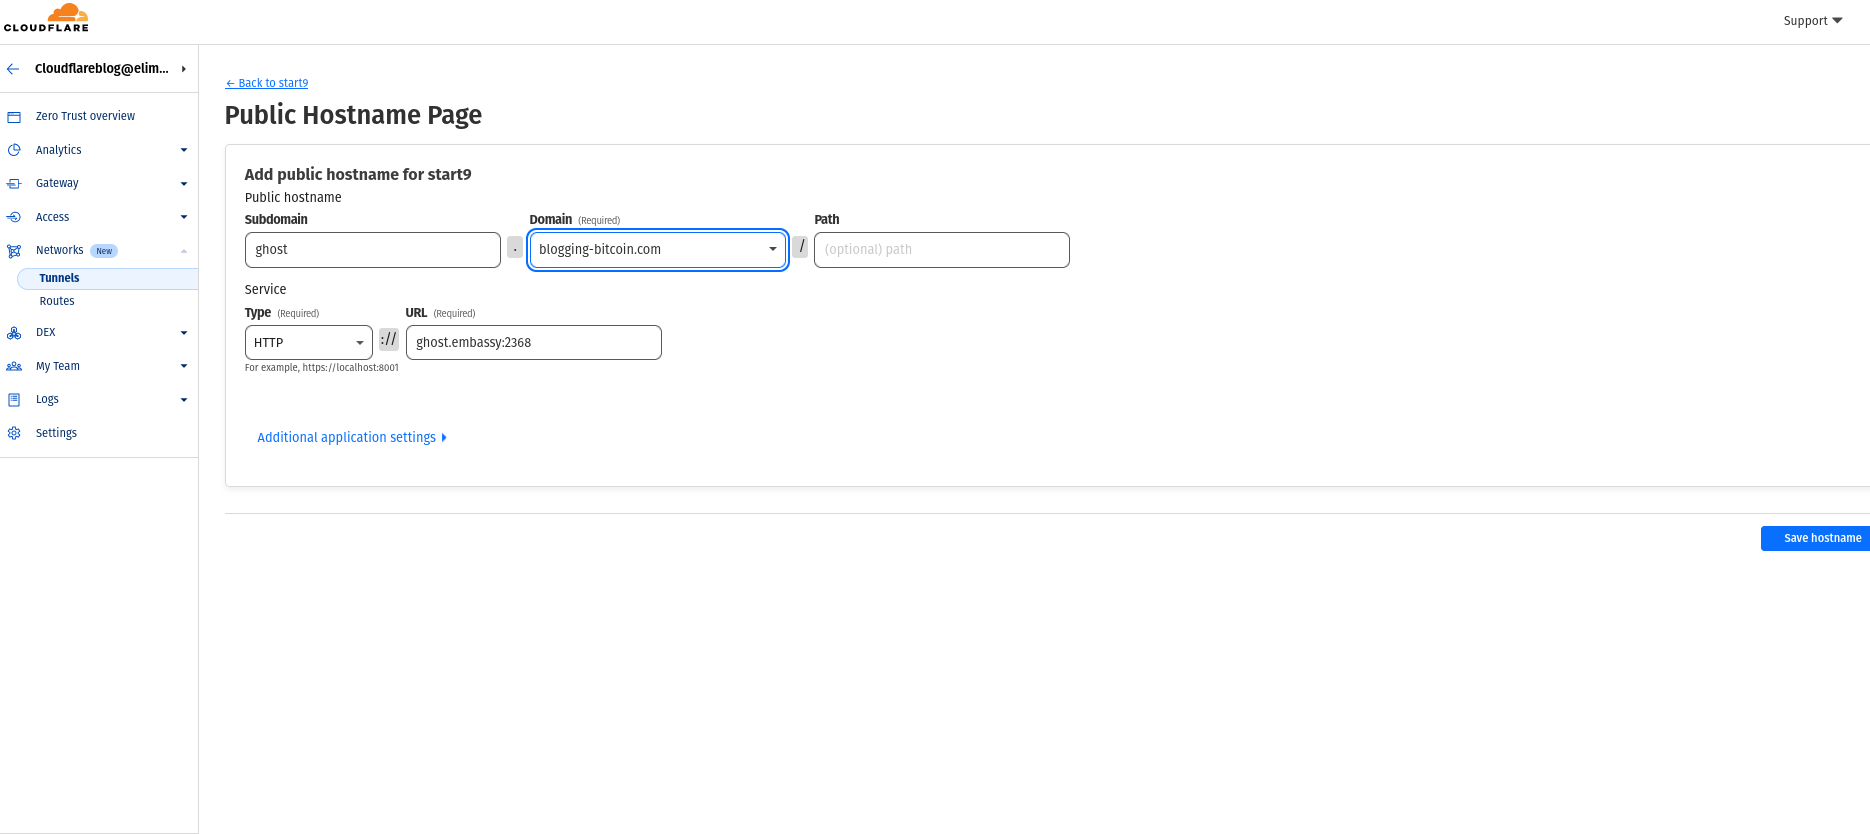
Your domain will be different of course but it will look follow this format:
Type HTTP
URL id.embassy:port_number
Then click save hostname.
After a few minutes you can access your website on the clearnet.
If you want to add LNBits, it would look like this:
₿logging ₿itcoin [845,643](
debtclock
🧡 Support this blog by using the Value 4 Value model.
Follow Me on Nostr
⚡[Zap This!(10% Goes To OpenSats)]https://nosl.ink/tadiqmv-)
🍐Join my Keet Room
📻 Stream sats
❓Send a Boostagram
🛒Shop The Elliptic Curve Economy

